

General Boot Liner fitting instructions
PACKING REQUIREMENTS
- Bootliner
- Tailgate Cover
Every Hatchbag boot liner has been designed to fit a specific vehicle.As every vehicle is different the method of fitting WILL vary from vehicle to vehicle. These instructions are a GENERAL guide to the different fixing methods
Hatchbag boot liners are generally designed to follow the contours of the carpet in the load area of your vehicle. We weld “hook fastener tabs” onto the boot liner fabric – these attach directly to the carpet in the load area of your vehicle (We will refer to this as “hook fastener friendly carpet).
HOWEVER, some vehicles have a combination of carpet, plastic and metal trim, for these vehicles we supply self-adhesive loop fastener. These adhesive tabs should be attached to the plastic / metal trim of the vehicle.
Please note none of the photographs are specific to your vehicle
PREPARATIONS
- Remove the load cover. In most cases it may be replaced later.
- Set the floor level to fit the specification of your order, if applicable.
- Set the seat incline to the specification of your order, if applicable.
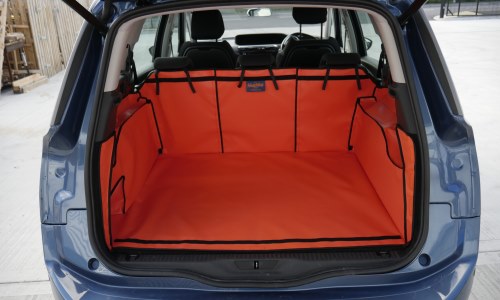
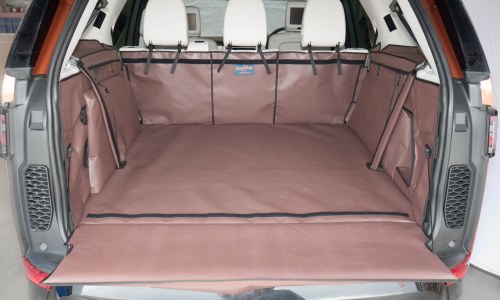
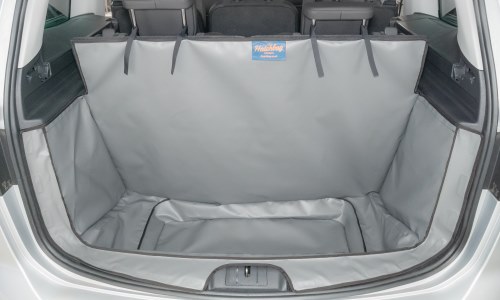
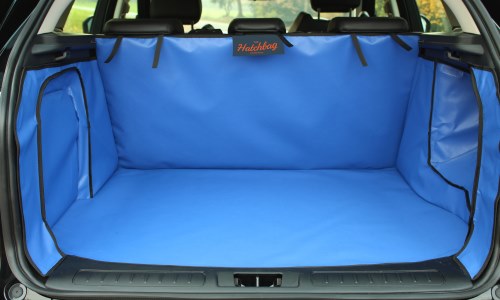
- Place the boot liner into the car boot with the Hatchbag logo at the seat end. Flatten the base so it fits snugly against the edges.
VERY IMPORTANT PREPARATION

To ensure the self-adhesive fasteners stick to the plastic trim, you MUST CLEAN the plastic from grime and REMOVE all the SILICONE applied during manufacture and valeting.
To do this please:
- Use a silicone remover, such as ‘Auto-Glym Intensive Tar Remover’ and apply generously to the surface you want to adhere to.
- Using a separate clean & dry cloth, thoroughly dry the surface until the cloth starts to drag. Attach 1 selfadhesive fastener tab to see if it sticks. (Repeat step 1 to 2 if necessary) A couple of spares have been provided.
- Attach the self-adhesive fasteners and let them fully adhere over the next 24 hours for the best bond.
The self-adhesive fasteners cannot be used once it has been in contact with silicone. Replacement kits are available from our website, under each car models’ accessory page.
FITTING
HOOK FASTENER FRIENDLY CARPET ONLY
BASE
- Hook fastener welded onto the boot liner will attach directly to the carpet.
FRONT
- PLUS / SPLIT VERSION ONLY - fasten the hook & loop fasteners between the side panels and the seat panel.
HOOK / LOOP
- Starting with the middle headrest, loop the hook & loop fastener straps around both headrest posts. Make sure to hold the front part of the base in position as not to pull the boot liner too far up. Repeat the procedure with the left and right headrests.
ELASTIC / BUNGEE
- If elastic loops or rubber bungees are sewn into the front panel of the boot liner, these attach to suitable points
located around the rear seat. Make sure to hold the front part of the base in position as not to pull the boot liner too far up.
REAR PLUS VERSIONS
You MUST unfasten the hook fasteners + the headrest straps before you recline the rear seat uppers. (‘Please refer to REAR PLUS / SPLIT options on website to see details)

HOOK FASTENER FRIENDLY CARPET
SIDES & BACK
- Carefully position the side panels snugly into place.
- The hook fastener welded / sewn on the reverse face of the panel will attach directly to the carpet.
ATTACHING TO PLASTIC
SIDES & BACK
- Carefully position the side panels snugly into place.
The self-adhesive loop fasteners will attach the boot liner to the boot sides
- Identify where the hook fasteners are on the outer face of the boot liner and there location in respect of the boot interior, in order to follow the next step.
- Align and attach the self-adhesive loop fastener tabs / strips in the fitting kit to the plastic / metal trim.
Adding optional extras - please note
- If you add a rear plus / rear split option then when you fold your 2nd row seats down, there will be a small gap at the top and side of the seats left exposed. The rear seat flap or boot liner extension will cover theses - see optional extras
- If you decide to purchase a seat flap, bumper flap or boot liner extension at a later date, then you will need to stick the loop fastener strip onto the liner yourself, rather than it being securely sewn on.
OPTIONAL EXTRAS
Please note the following photos are non-specific to your vehicle
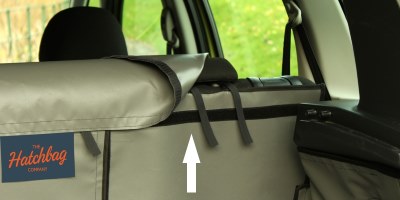
IMAGE 1

IMAGE 2
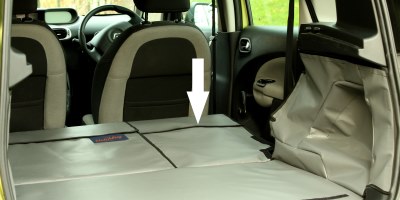
IMAGE 3
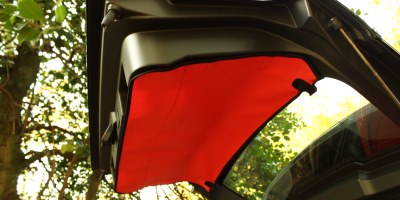
IMAGE 4
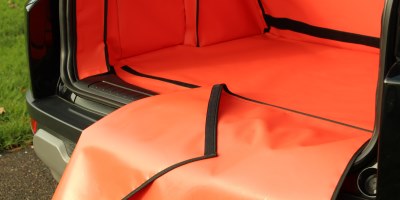
IMAGE 5
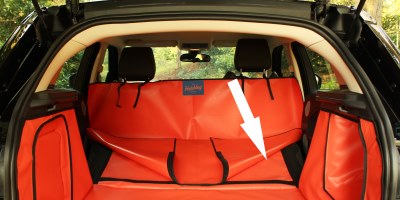
IMAGE 6
SEAT FLAP
- The seat flap is designed to protect the top of your rear seat giving additional protection from drooling dogs etc.
- The seat flap can also be used in conjunction with the rear plus or split option(s). With the rear seats in the folded position the seat flap covers the exposed gap at the top of the seats. (image 3)
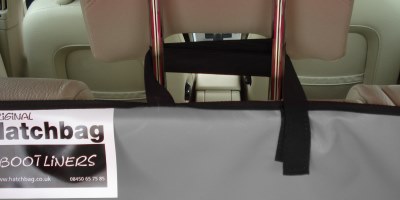
- Lower the headrests.
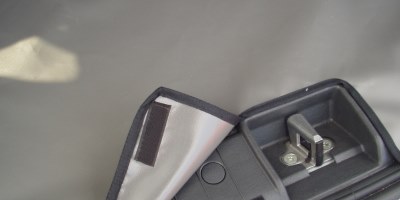
- Attach the seat flap to the loop fastener strip that has been sewn onto the boot liner just below the top of the rear seats. (image 1)
- The flap is then placed over the rear head rests and down the back of the passenger seats. (image 2)
- If the seat flap sits over large headrests and obstructs your rear view: carefully create openings in the flap to accommodate the headrest posts.
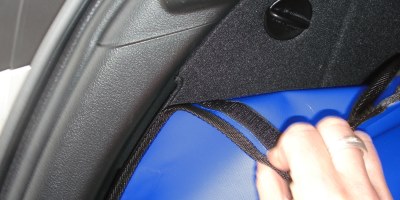
TAILGATE COVER
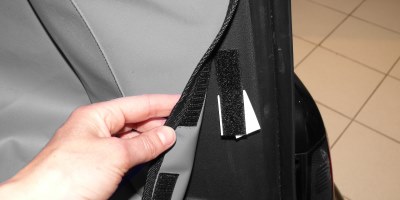
- Line up the tailgate cover with the tailgate and clean the areas where the self-adhesive loop fastener tabs will be stuck. (image 4)
- Use the self-adhesive loop fastener tabs to attach the cover to the plastic trim.
BUMPER FLAP
- Fit boot liner.
- Attach the bumper flap to the loop fastener strip that has been sewn onto the base of the boot liner. (image 5)
- The bumper flap either folds into the vehicle OR can be detached and stored elsewhere when you close the tailgate.
FLOOR EXTENSION
The “floor extension” offers superior protection to the rear seats when purchased in conjunction with a REAR PLUS option.( image 6)
- The floor extension is designed to attach to a rear plus/rear split version liner.
- It offers additional protection to the back of the front seats and the extended floor area when the rear seats are folded flat.
- It will offer no protection to the rear doors
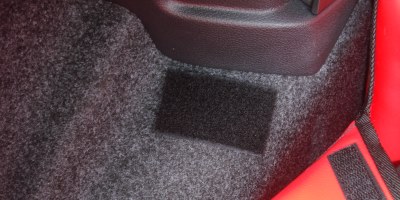
IMAGE 7
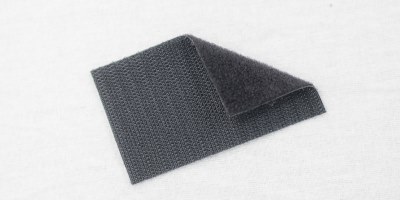
IMAGE 8
FREQUENT USE KIT ( hook fastener friendly carpet only)
- If you frequently remove/fit your boot liner from/to your vehicle please note that the carpet will “fluff” up –and to prevent this from happening we have an alternative “Frequent Use Fitting Kit” (image 7+8)
The frequent use fitting kit can be found under the models’ respective accessory page, labeled as “Frequent use tabs”. These can be purchased any time.