
How to fit a boot liner, A general step-by-step guide
- 5 Feb 2016
Every Hatchbag Boot Liner has been designed to fit a specific vehicle. As every vehicle is different the method of fitting will vary. These instructions are a general guide on how to fit a boot liner.
Our boot liners are designed to follow the contours of the carpet in the load area of each vehicle. We weld hook Velcro tabs onto the boot liner, which will attach directly onto the Velcro friendly carpet of the load area. However, for some vehicles, there is a combination of carpet, plastic and metal trim, for which we supply self-adhesive loop Velcro tabs, which attach to the plastic/metal trim of the vehicle, which in turn attach to the hook Velcro tabs on the boot liner.
Preparation
Before fitting a boot liner, you will need to do the following:
- *Clean plastic/metal surfaces that you boot liner will be attached too (see our previous blog “How to Clean your car boot”)*
- Remove the load cover cassette. In most cases this can be replaced later.
- For some vehicles, you will need to fold the second row of seats flat before fitting the liner. In other cases, you will need to make sure that the rake of your second row seats is in the correct position as stated in each individual manual.
- Moreover, for some vehicles there will be two versions of floor level either a raised floor or lowered floor version. Please make sure your boot is in the correct floor position as ordered. This information can be found online on your vehicle page.
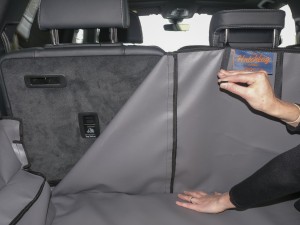
- Once the steps above have been followed, you can then unfold the Hatchbag and place it in the vehicle so that the base fits snugly in position. The panel with the Hatchbag label sits against the back of the rear seat.
Fitting the base
Fit the liner from the tailgate end going forwards unless stated otherwise on your individual fitting instructions.
For Velcro friendly carpets
- The Velcro on the reverse of the liner will attach directly to the carpet on the base.
- The liner on the base will fit level to the tailgate plate.
Attaching to plastic/metal trim
- IMPORTANT - Before attaching Velcro to the plastic trim – please refer to our previous blog “how to clean your car boot”
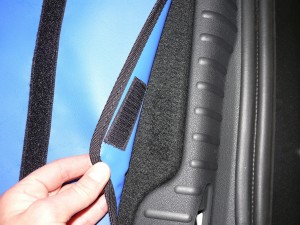
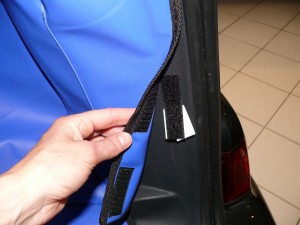
- Attach the self-adhesive loop Velcro tabs to the hook Velcro welded onto the liner. Then line it up with the plastic/metal trim. Peel off the protective backing on the adhesive Velcro tab, and apply firmly to the aligned surface
Fitting the side panels
For the majority of the vehicles, you can fit the sides once you have fitted the base of the boot
For Velcro friendly carpets:
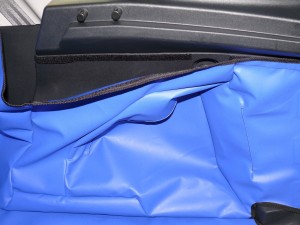
- Carefully position the side panels in place.
- The hook Velcro tabs welded on the reverse of the liner will attach directly to the carpet.
Attaching to plastic
- IMPORTANT - Before attaching Velcro to the plastic trim – please refer to our previous blog “how to clean your car boot”
- Attach the self-adhesive loop Velcro tabs to the hook Velcro welded onto the liner. Then line it up with the plastic. Peel off the protective backing on the adhesive Velcro tab, and apply firmly to the aligned surface
Fitting the Front panel
- If the row 2 seats are folded, put them in an upright position
- Wrap the headrest straps around the headrest
- Hold the bottom of the front panel in place as you fasten the head rest straps around the headrest pole in a clockwise position
For Rear Plus / Rear Split Versions
- When fitting the sides for a rear plus or rear split work from the bottom upwards
- Fold the Velcro from the bottom corner up to give a strong seal
- Then attach headrest straps
And now you should have a fully fitted boot liner.