

Audi A6 Estate 1998 – 2005 Boot Liner Fitting Instructions
WITH OR WITHOUT MESH SAFETY NET CASSETTE LEFT IN
Our ref: H0312
Read offline:  Download PDF
PACKING REQUIREMENTS
With mesh net cassette
- Minimum of 11 self-adhesive loop fastener tabs
- 4 X 10⁷
- 4 X 10⁴
- 2 X 114
- 3 own folded base tabs
- 5 own net cassette tabs
Without mesh net cassette
- Minimum of 6 self-adhesive loop fastener tabs
- 4 X 10⁷
- 4 X 10⁴
- 2 X 114
- 3 own folded base tabs

VERY IMPORTANT PREPARATION
To ensure a good bond, when using the self-adhesive fasteners to attach the Bootliner to the plastic / metal trim (Not the carpet); it is most important to remove silicone film from the vehicle trim.
Silicone is applied during manufacture and can also be found in many valeting products. It is highly likely there will be a build-up of silicone.
Before applying any self-adhesive fastener pads, the surface MUST be thoroughly cleaned using a silicone remover. (The fasteners cannot be used once it has been in contact with silicone). We recommend "Intensive Tar Remover” made by AutoGlym and available from Halfords.
Wipe off thoroughly any residue with a separate clean dry cloth. Unfortunately we are unable to supply this product, as it cannot be transported via our postal carrier.
NOTE: the adhesive takes 24hrs to reach full adhesion – do not touch during.
PREPARATION
- Remove the load cover cassette, it can be replaced later.
- Unlock rear seat back rest and fold down.
Liners for “Mesh Safety Net cassette to be left in” only:
- Open passenger doors, and slide off the load net cassette.
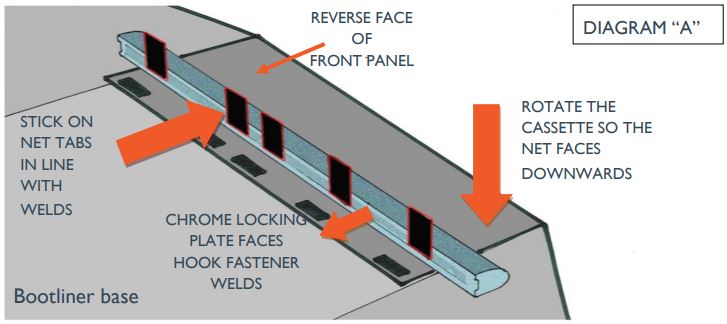
Diagram “a”
- Place the Bootliner on the ground: The front panel’s reverse face, facing upward.
- Place the net cassette centrally on top of the front panel. Ensure the net opening faces downward and the chrome locking plate faces the hook fastener welds on the front panel.
- Using the self adhesive fasteners, attach the 5 Net Cassette Tabs to the recessed channel in the chrome locking plate. They must be aligned to the hook fastener welds on the liner. The loop fastener section of the tabs will sit above the cassette.
- Replace the net cassette carefully.
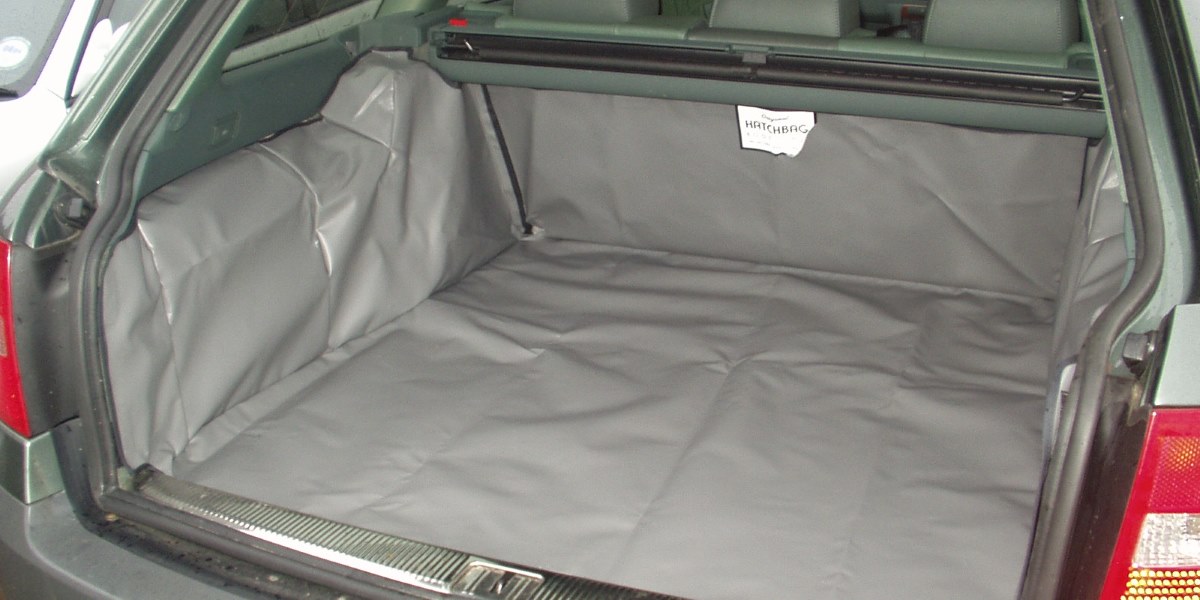
- Place liner into car and unfold
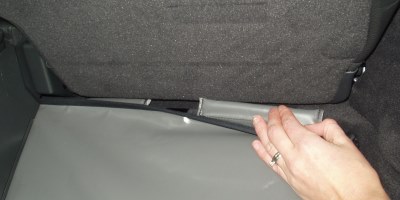
PHOTO A
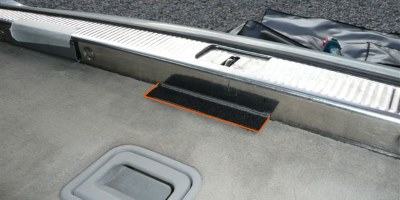
PHOTO B
FITTING
BASE
- Position base of liner snugly into place
- Attach the 4 ties to the corresponding luggage hooks. DO NOT TIE TIGHTLY this will distort the base. They have been designed to reduce shift on the base panel.
- Photo A
Push the two foam filled flaps down into the void between floor and seats. - Photo B
At the tailgate end of base. The 3 folded Base tabs are attached to the stainless steel plate at floor level, using the self adhesive loop fastener tabs. Ensure they are aligned to the hook fastener welds on the base of the liner. - Re-lock rear seat back rest.
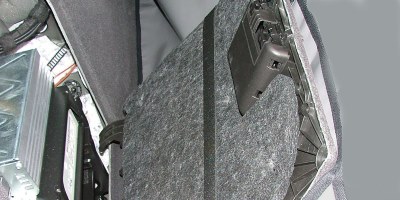
PHOTO C
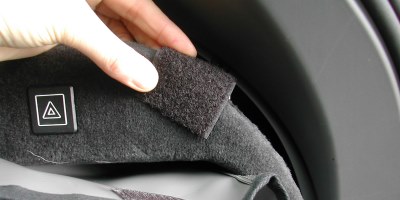
PHOTO D
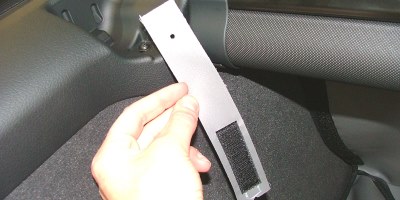
PHOTO E
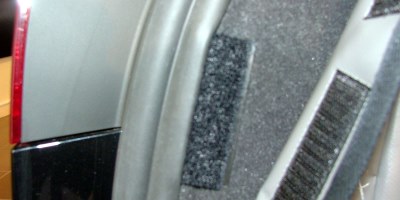
PHOTO F
SIDES
- Photo C
Unlock the two access panels in the sides of the car. The lengths of elastic sewn onto the reverse face of the liner sides pass over the panel doors and sit almost midway down. - Photo D
Attach 104 tabs to the inner side of these panels in line with the hook fastener welds on the back face of the liner. The liner fastener closes to the protruding section of these tabs when panels are replaced. - Photo E
When the load cover cassette is removed you can access two small screws in the net cassette recess lock. Remove the screws, and then replace with the 114 tabs passed over them. The tab hangs down to fasten close to the liner. - The foam sections attached to the liner push into the gap between carpet and side panels.
- Photo F
4x10⁷ clips.
Pull back the rubber seal on the door aperture to reveal the top corner edge of the carpeted panel. Slide the curved section of the “J” profile over this Reposition to align with fastener welds, and fasten close. Repeat for opposite side
FRONT
- Position the front of liner against the back of the seats
- Without net: Align the fastener straps with the headrest posts. Each strap should be passed around its corresponding post, and “fasten closed”
- With net: position front panel up to the protruding tabs, and fasten close.
REAR PLUS VERSIONS
YOU MUST UNFASTEN THE HOOK & LOOP FASTENERS or THE HEADREST STRAPS BEFORE YOU RECLINE THE REAR SEAT UPPERS